The monster manager is a tool for dungeon masters which is centered on controlling combat encounters in dungeons & dragon 5th edition. It also has a few other features which can come in very useful when you find yourself in the role of a dungeon master (game master). Click the help icon in the bottom right of your screen, to return to this index at any time.
This is a basic guide to help users understand how the monster manager works. The interface might seem confusing at first, but after reviewing this file you should be making encounters, spells and creatures in no time. While easily handling combat in dungeons & dragons 5th edition!
The monster manager is a legal tool which features all the monsters and spells released in the system reference documents by wizards of the coast. These documents do not include every single monster or spell available in the core books, but the monster manager has features which allow you to type in the missing information manually and save them for your own use. You can also type in any monster or spell you have created yourself, allowing for a wide array of homebrew content.
To use the initiative tracker, simply click the link in the top left corner of the screen. This will open the window and allow you to edit it for players, npc’s and monsters. There is a maximum of 12 slots available which should be sufficient for most DM’s.
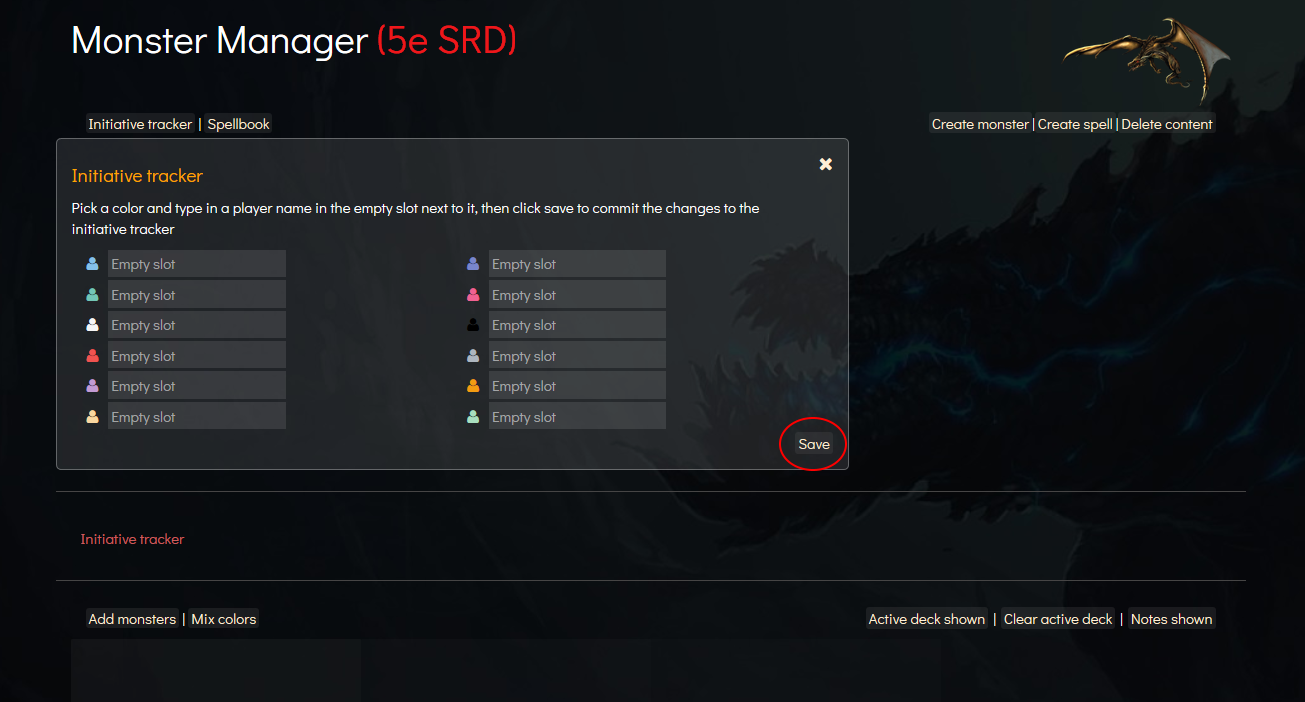
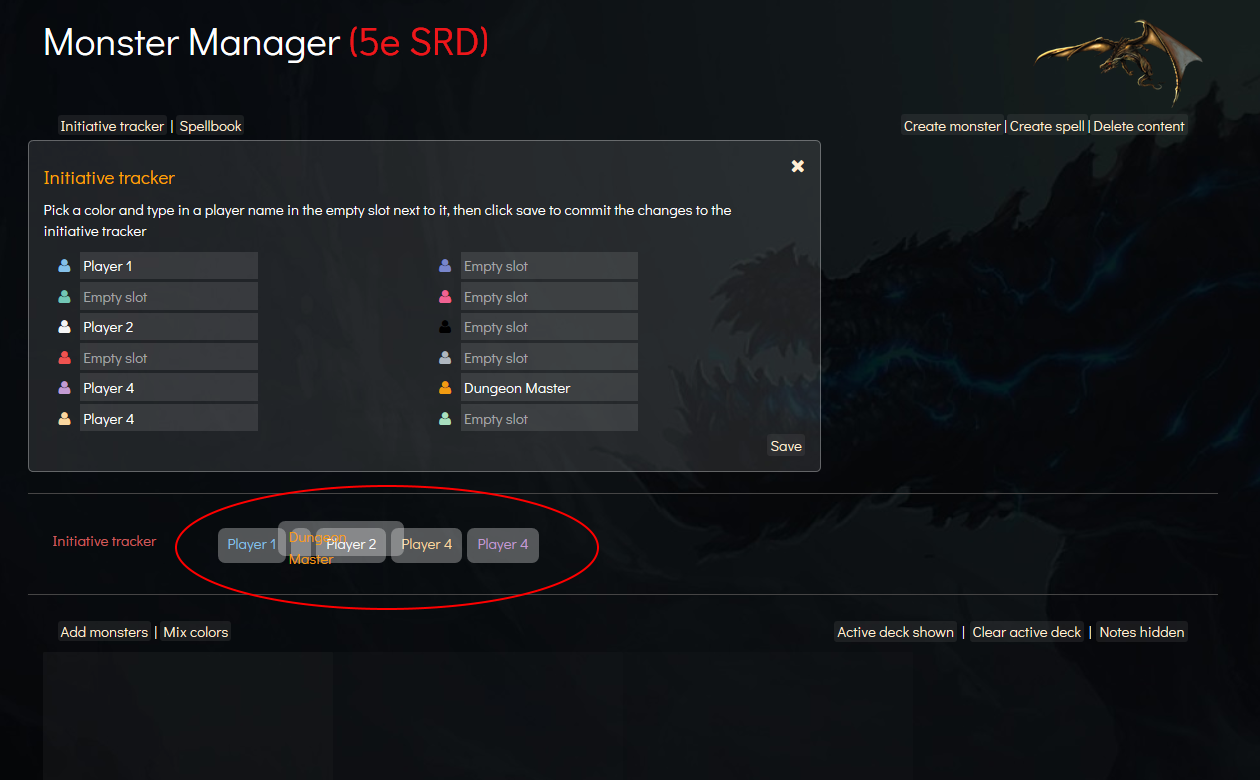
To use it simply fill out the name next to the color you prefer – as shown below – and click the save button in the bottom right corner of the window.
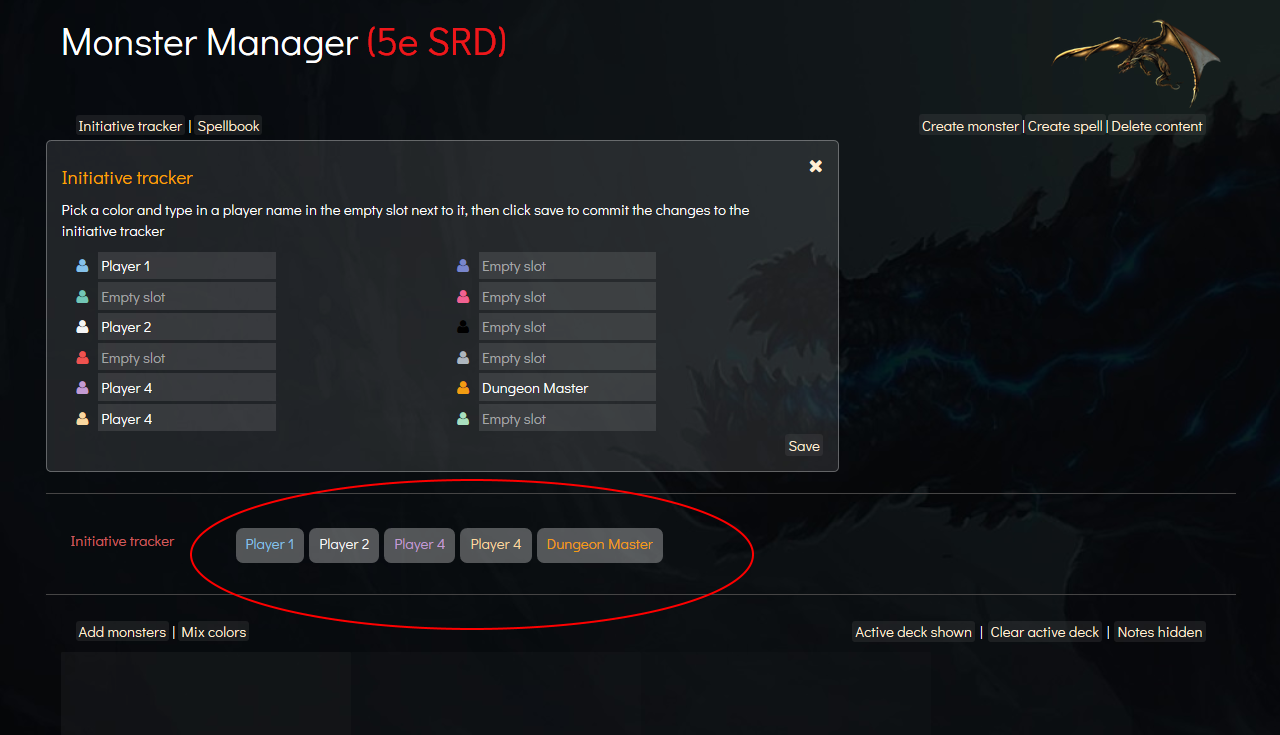
After you click save you will notice small boxes appearing next to the initiative tracker text, when rolling initiative simply drag and drop the boxes in the order the rolls determine.
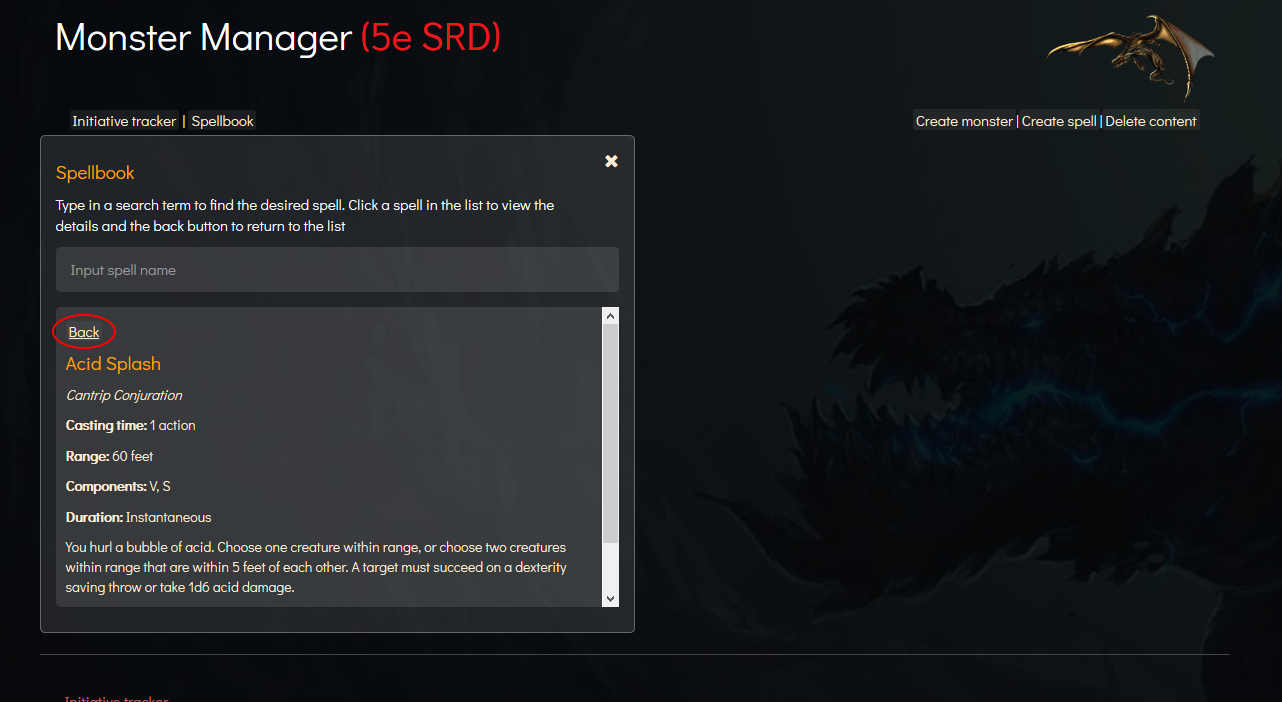
The spell book allows you to quickly look up information about spells. You can either scroll through the list or type in a search word to look up a certain spell, the search updates the list below on the fly. To reset the list, simply delete everything in the search field.
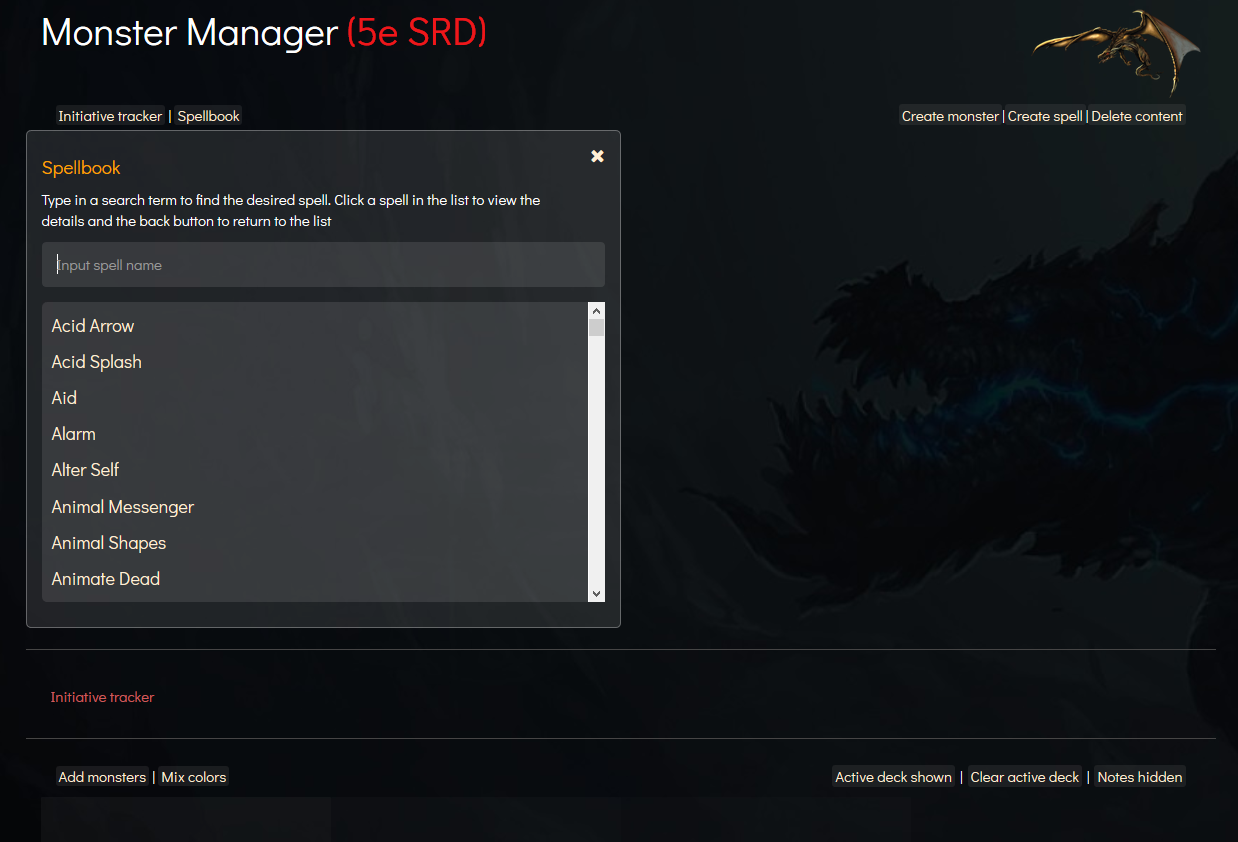
To see the details of a spell in the list, simply click it. When you are done viewing the information, click the back button in the top to take you back to the spell list.
The monster manager is the primary tool for keeping tabs on monster or NPC hit points and conditions. It’s quite easy to either make encounters on the fly or loading encounters you made in advance.
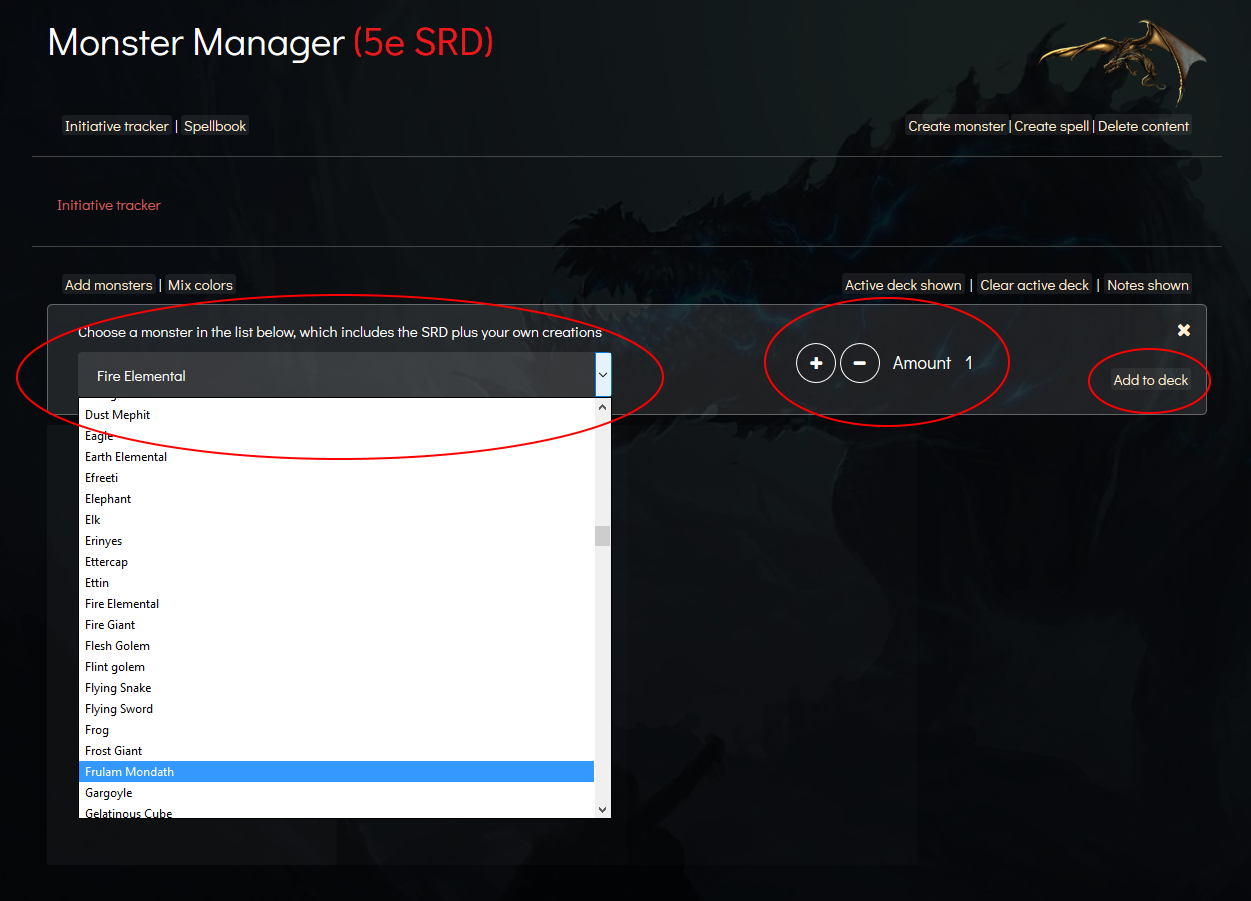
In the top left corner of the middle part of the screen, click the “add monsters” link. This will open a window with a list of all the monsters available (including the ones you create yourself). To add a monster to the deck, simply click it, then choose the amount by clicking the + and/or – button and finally click “Add to deck”.
After you add a monster (or several of that monster) to the deck, they will appear in the middle of the screen.
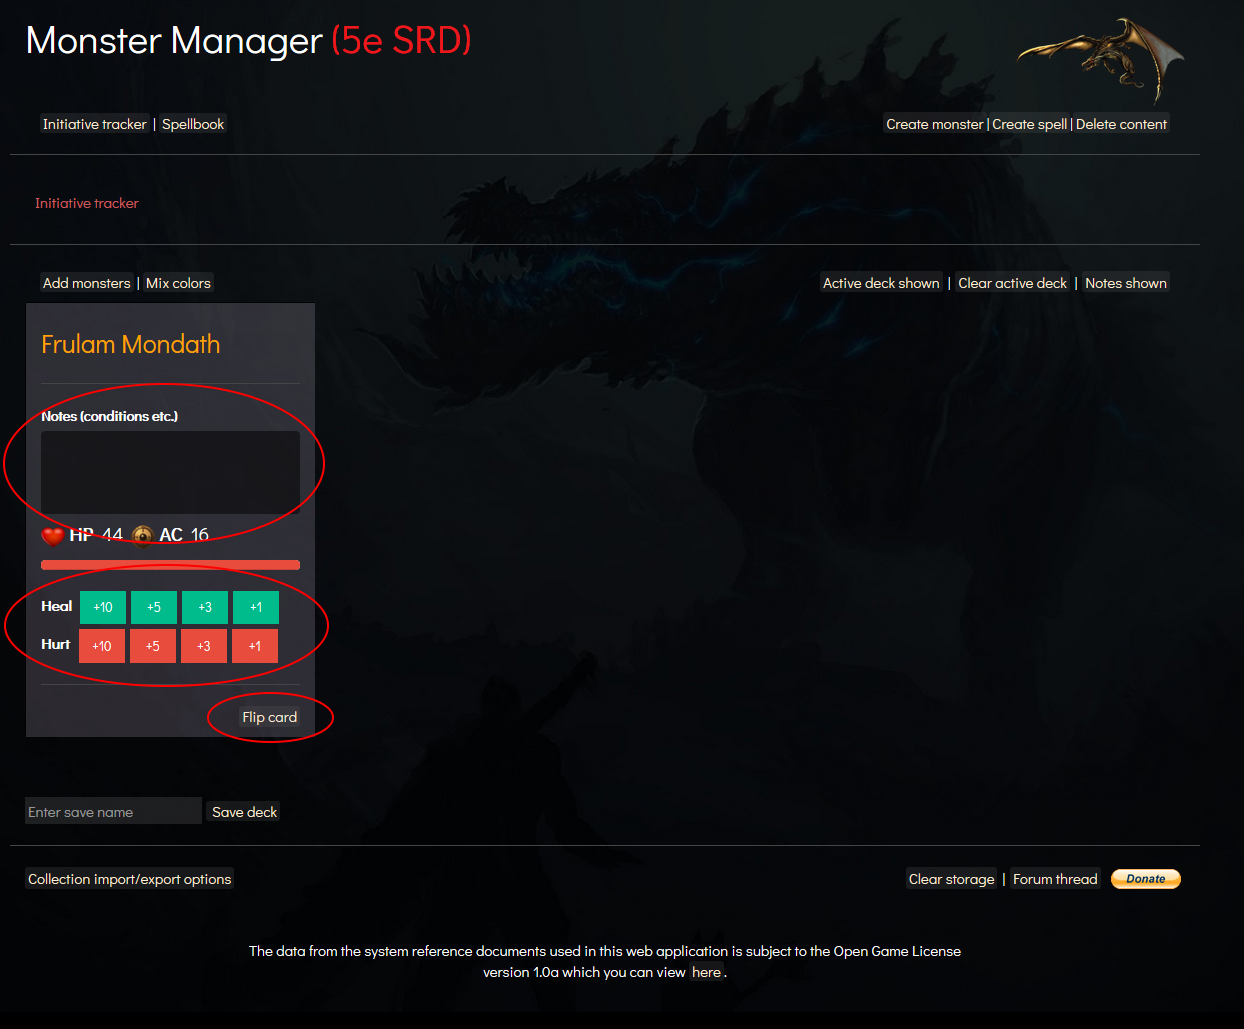
You can damage the monster by click the red buttons (which subtracts the amount of hit points shown on the corresponding button) from their total health pool or use the green buttons to heal in the same way (up to a maximum of the monsters total hit points).
There is a small input field as well, in which you can type in conditions or debuffs or whatever you might need to keep tabs on during a fight for that particular monster.
If you click the “flip card” button in the bottom right corner of a monster card, it will show the complete details for that particular monster depending on how much information is available (as shown below). This allows you easily see important information you will need during an encounter. To leave the detail section, simply flip the card once again.
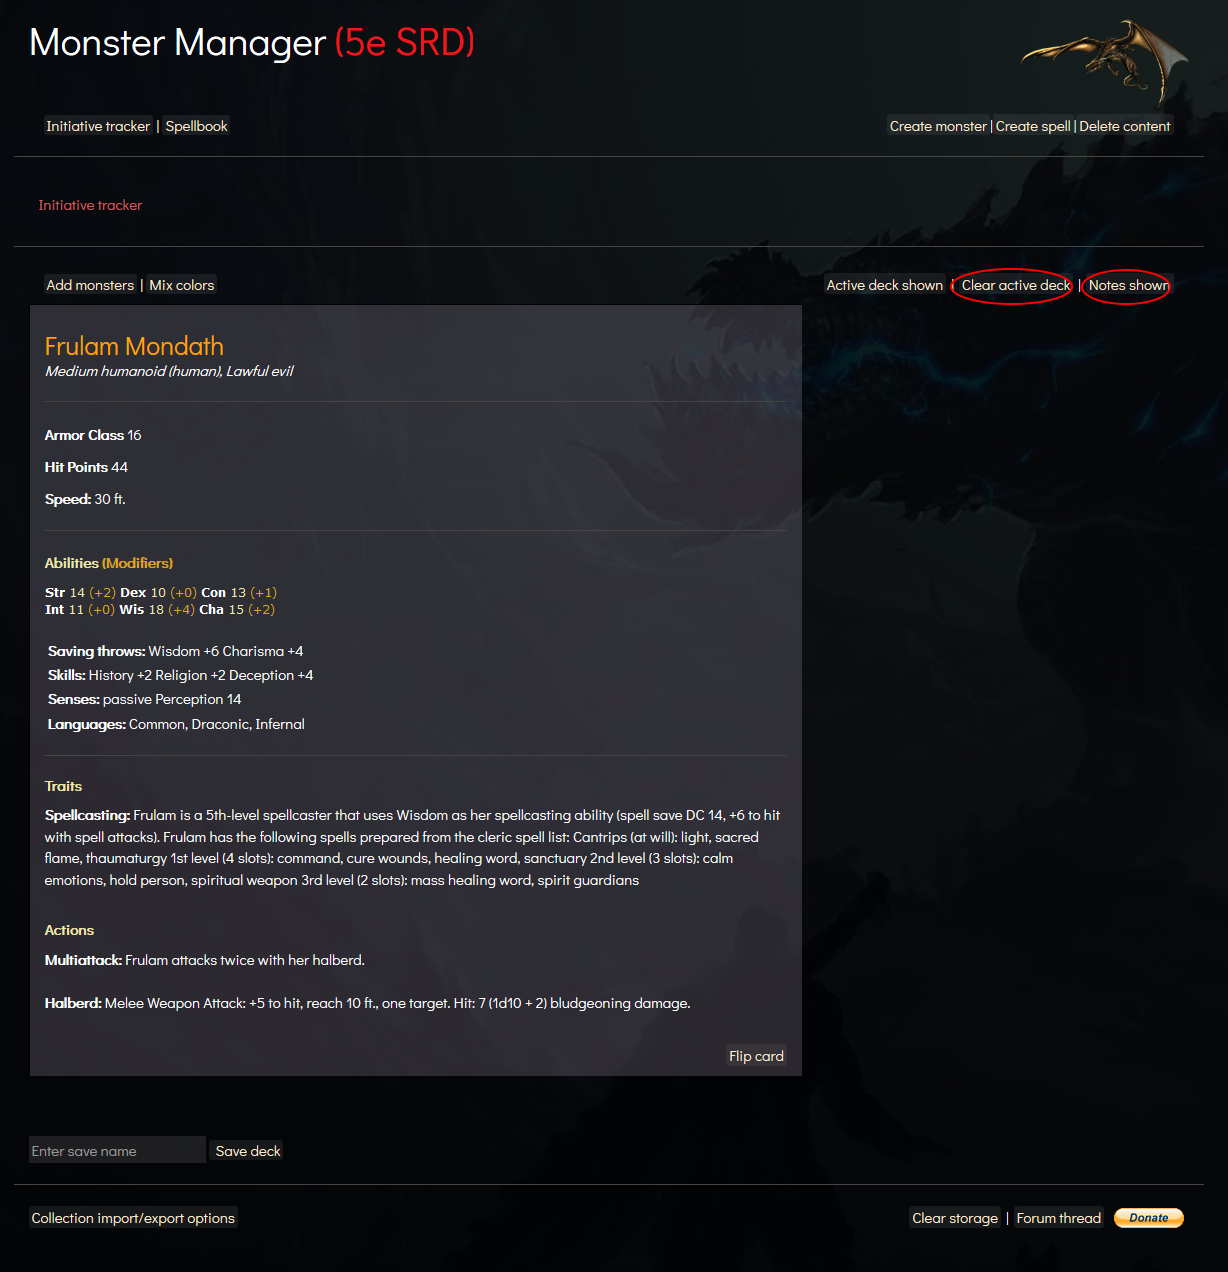
Clear active deck
The clear active deck link in the top right corner of the middle section, will clear all monster cards active on the screen.
Notes shown
The notes shown next to the Clear active deck button, allows you to toggle the small input field on each monster on or off. Allowing for a more compact card view, if you feel you don’t really need to make notes anyway.
If you want to create encounters in advance – before your d&d session starts – you can easily create various combinations of monsters and save them using the small input field in the bottom left corner of the middle section. Simply type in a name you feel is appropriate for the encounter and click the “save deck” button, this will save the combination of cards currently active on the screen.
After you have saved your deck you can click the “active deck shown” link, in the top right corner of the middle section. This will switch to your collection of decks – as shown below – and allow you to delete or load these decks whenever you need them.
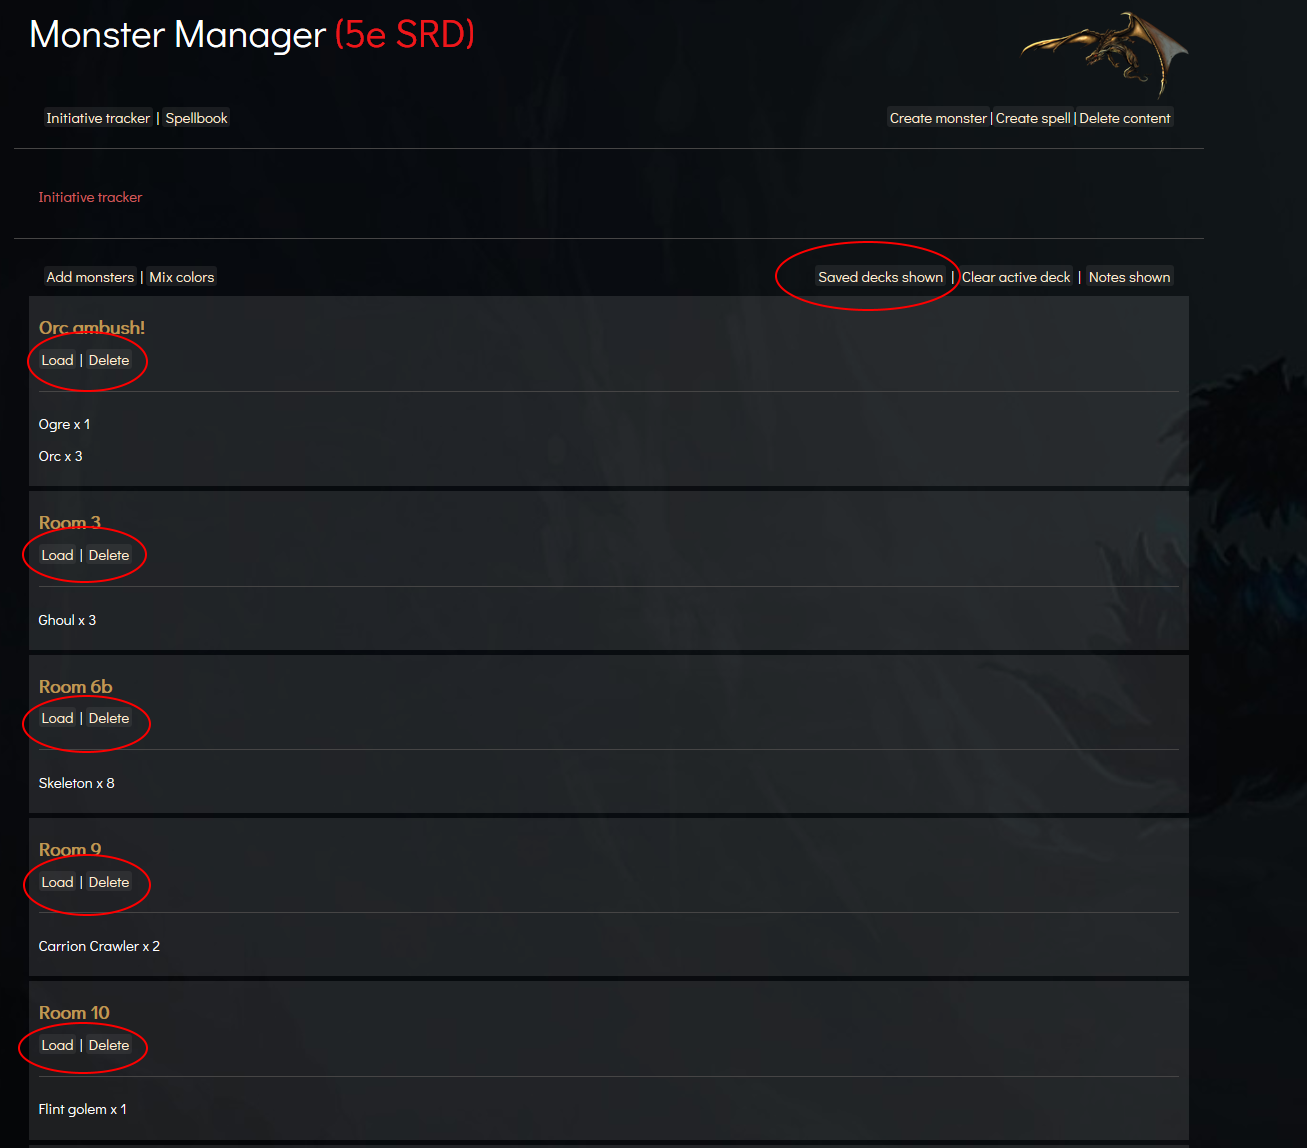
From here you can either load a specific encounter or click the “Saved decks shown” link in the top right corner of the middle section once more, to switch back to your active deck. If you load a deck, the screen will automatically take you back to the deck you just loaded.
To create a monster to add to your collection, simply click the “Create monster” link in the top right corner of the screen, this will open a window allowing you to fill out all information about that monsters, down to the last detail.
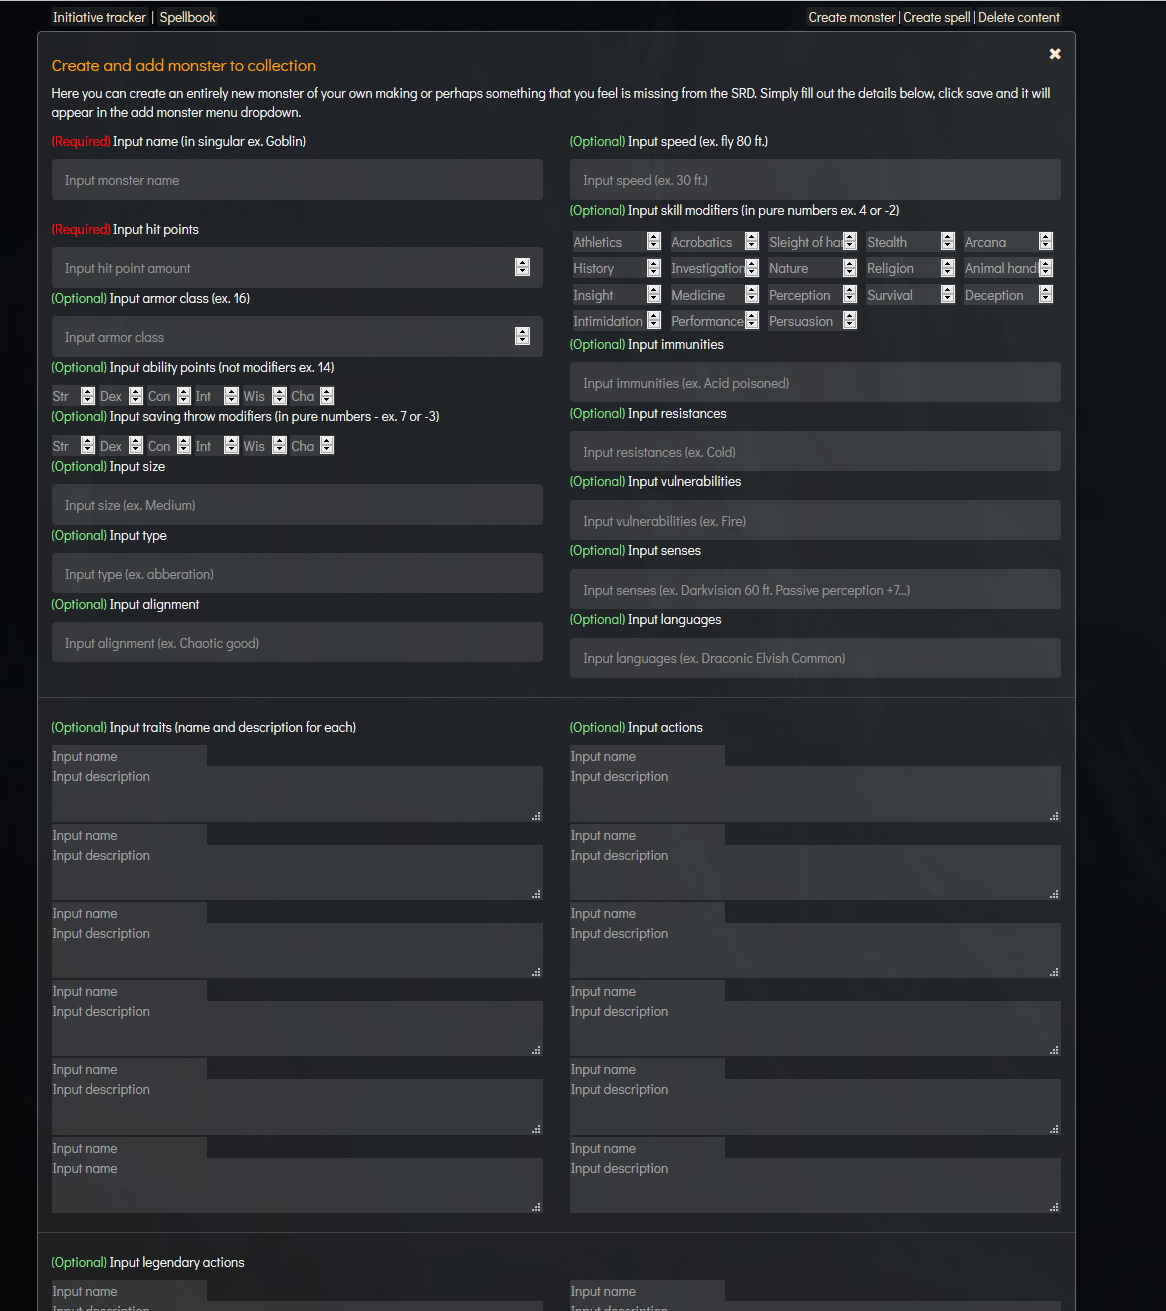
After you have filled out all the details, click the save button in the bottom right corner of the window. Your monster is now added to the complete collection and you can add it just like any other monster as described in the “Using the monster manager” section.
You can easily add spells to your collection and look them up in the spell book at any time, by click the “Create spell” link in the top right corner of the screen. A window will open allowing you to fill out the information necessary for the spell.
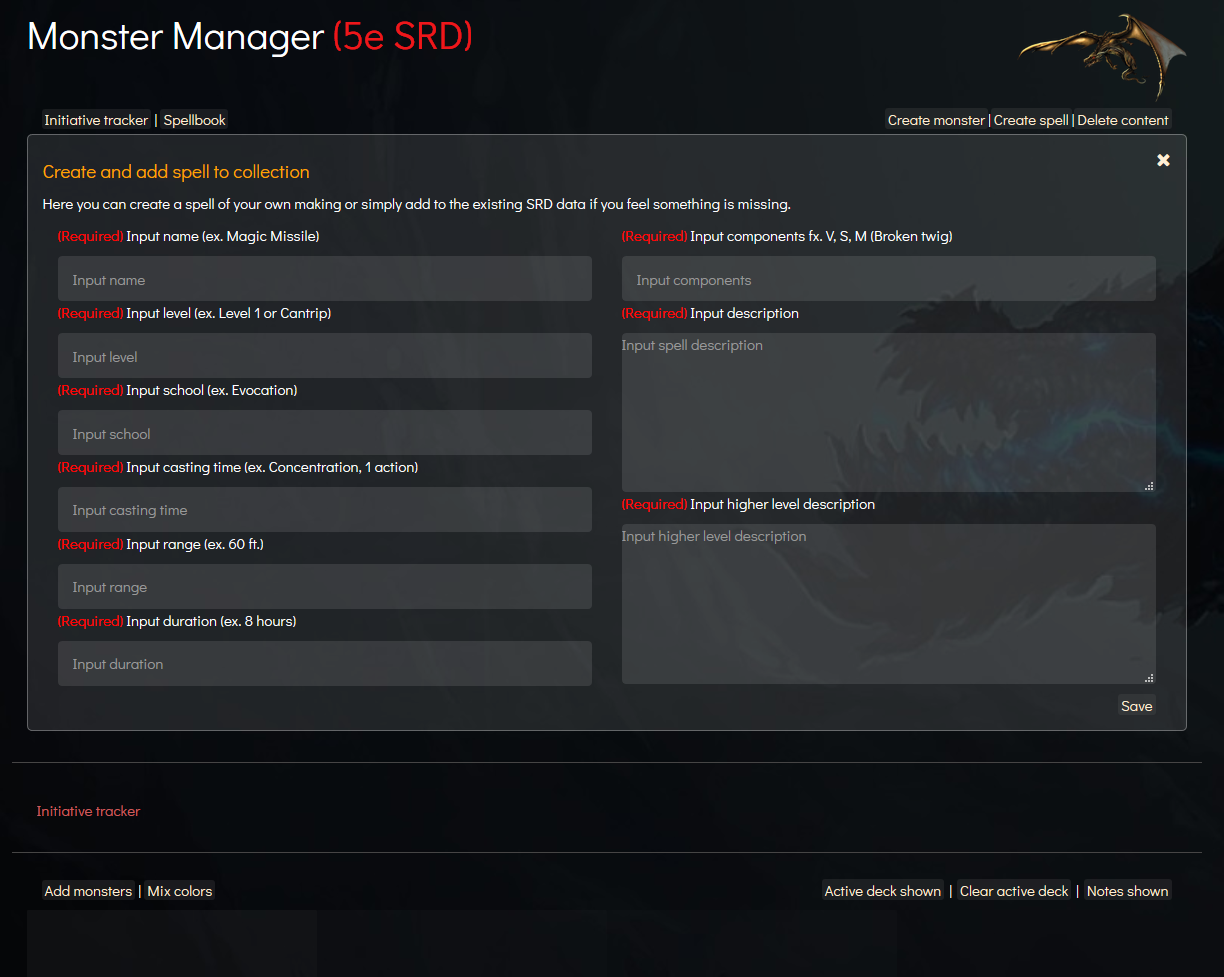
When you’re done, simply click the save button in the bottom right corner of the window. The spell is now available in the spell book and has been added to your collection.
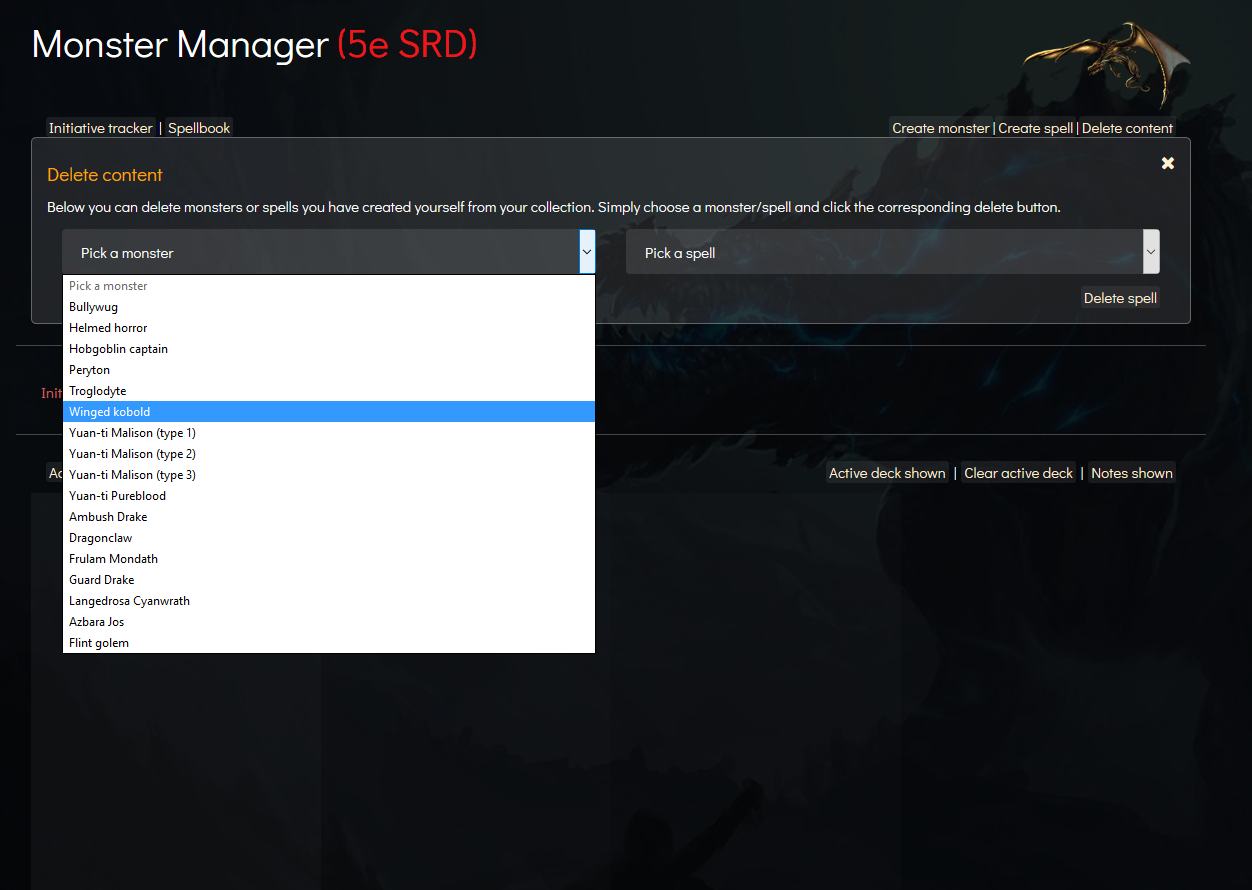
To delete content, simply click the “Delete content” link in the top right corner of the screen. Two drop down menus will appear in the window that opens. To delete something, simply choose the monster or spell in the list and click the corresponding delete button below. The item will now be removed from the collection. You can only delete monsters or spells you have created yourself though, the information from the system reference documents will always be available.
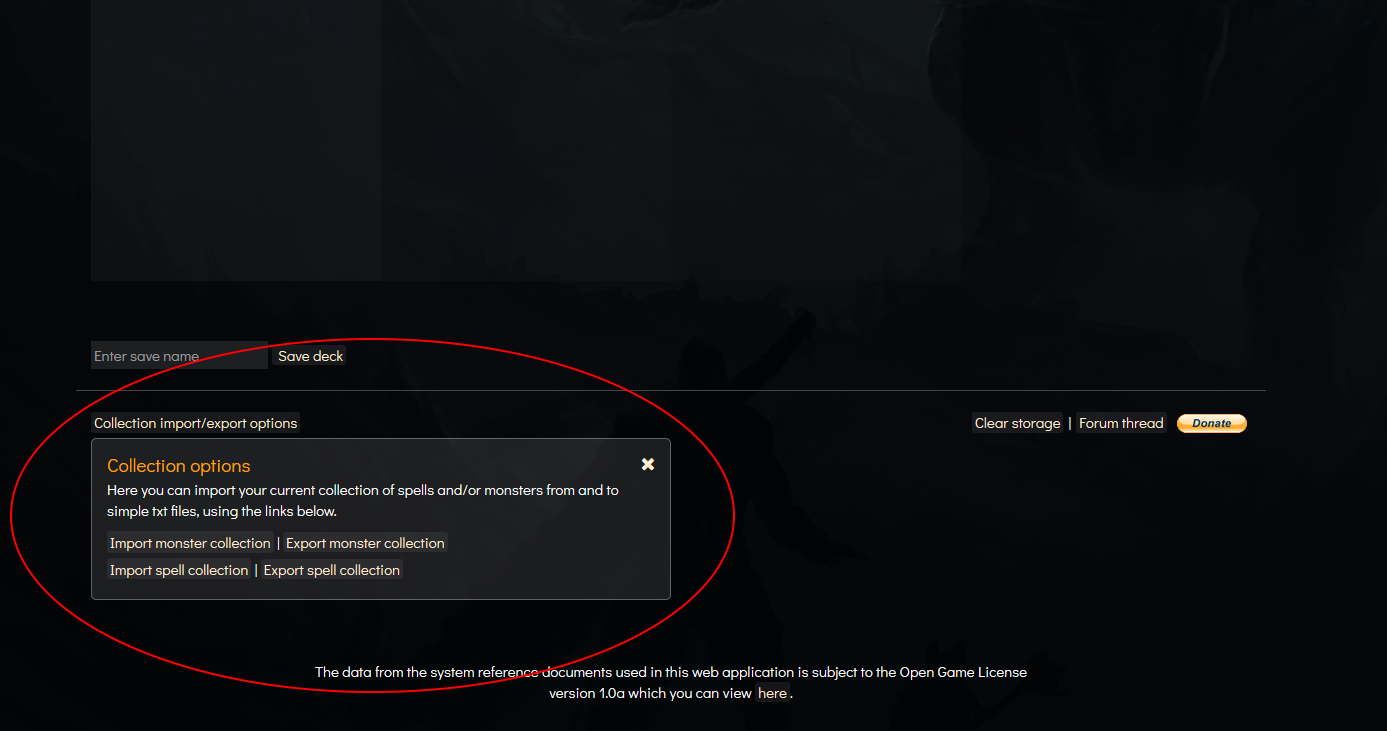
The information you input into this app is saved in your browsers local storage, this works a lot like a cookie and the information can therefore be lost if you reset your browser data someday. For this reason it is possible to export your current collection of either spells, monsters or encounter collections.
To either import or export monsters or spells, click the link in the bottom left corner of the screen entitled “Collection import/export options”. This will open a window, which allows you to export your current collection of custom made content to simple text files. You can then copy that file to a different device (like a smartphone, tablet or other pc) to quickly gain access to all the content you have spent so much time typing into the monster manage.
To import a collection you saved in a file, simply press the import button and browse to the file. Keep in mind though, that when you import a collection it will overwrite anything you currently have.
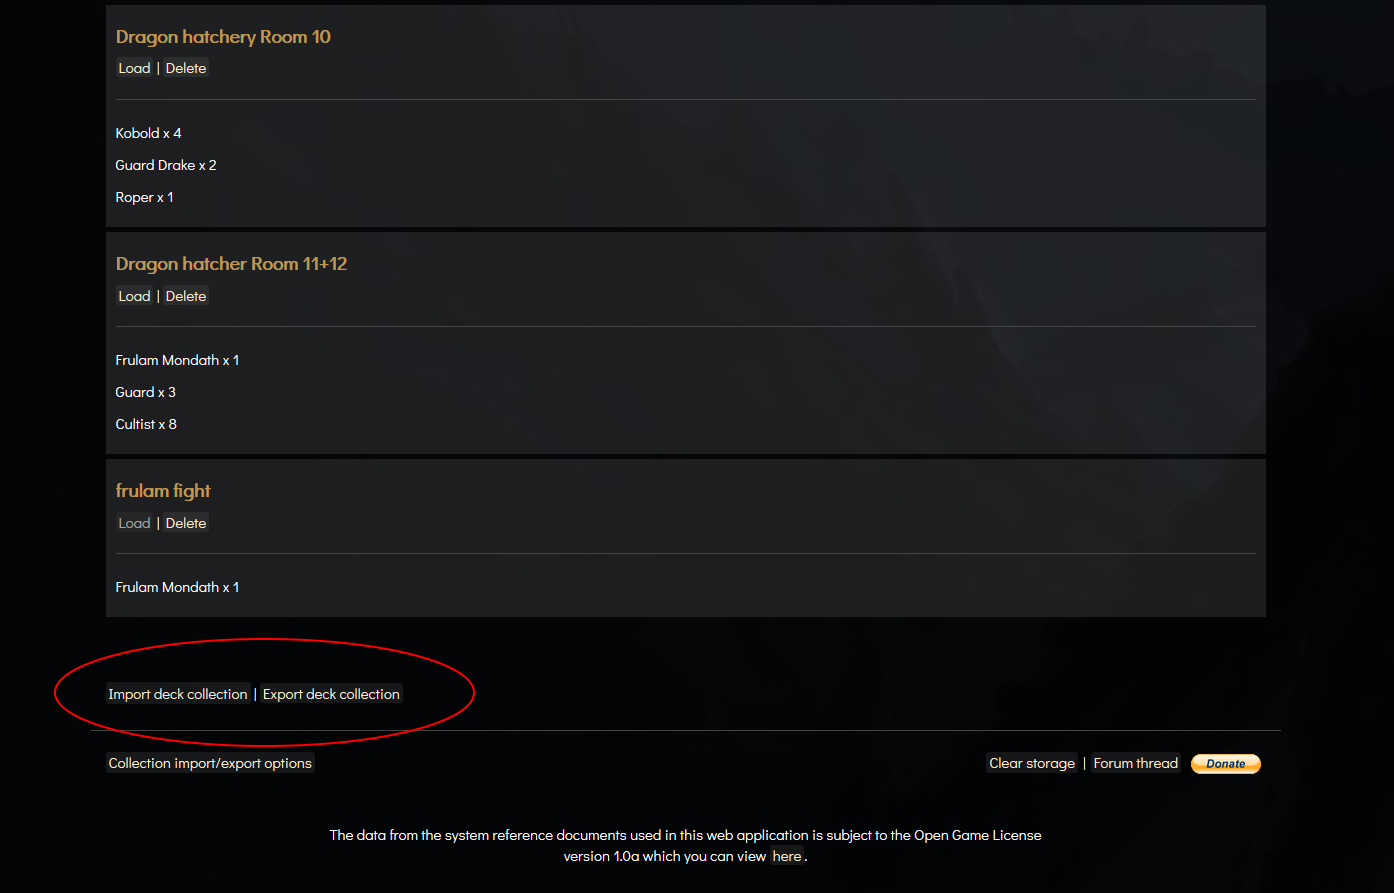
You can also export and import your collection of decks in the same way you do with monsters and spells. Except the link is located on the saved decks screen, in the bottom left corner of the middle section as shown below.
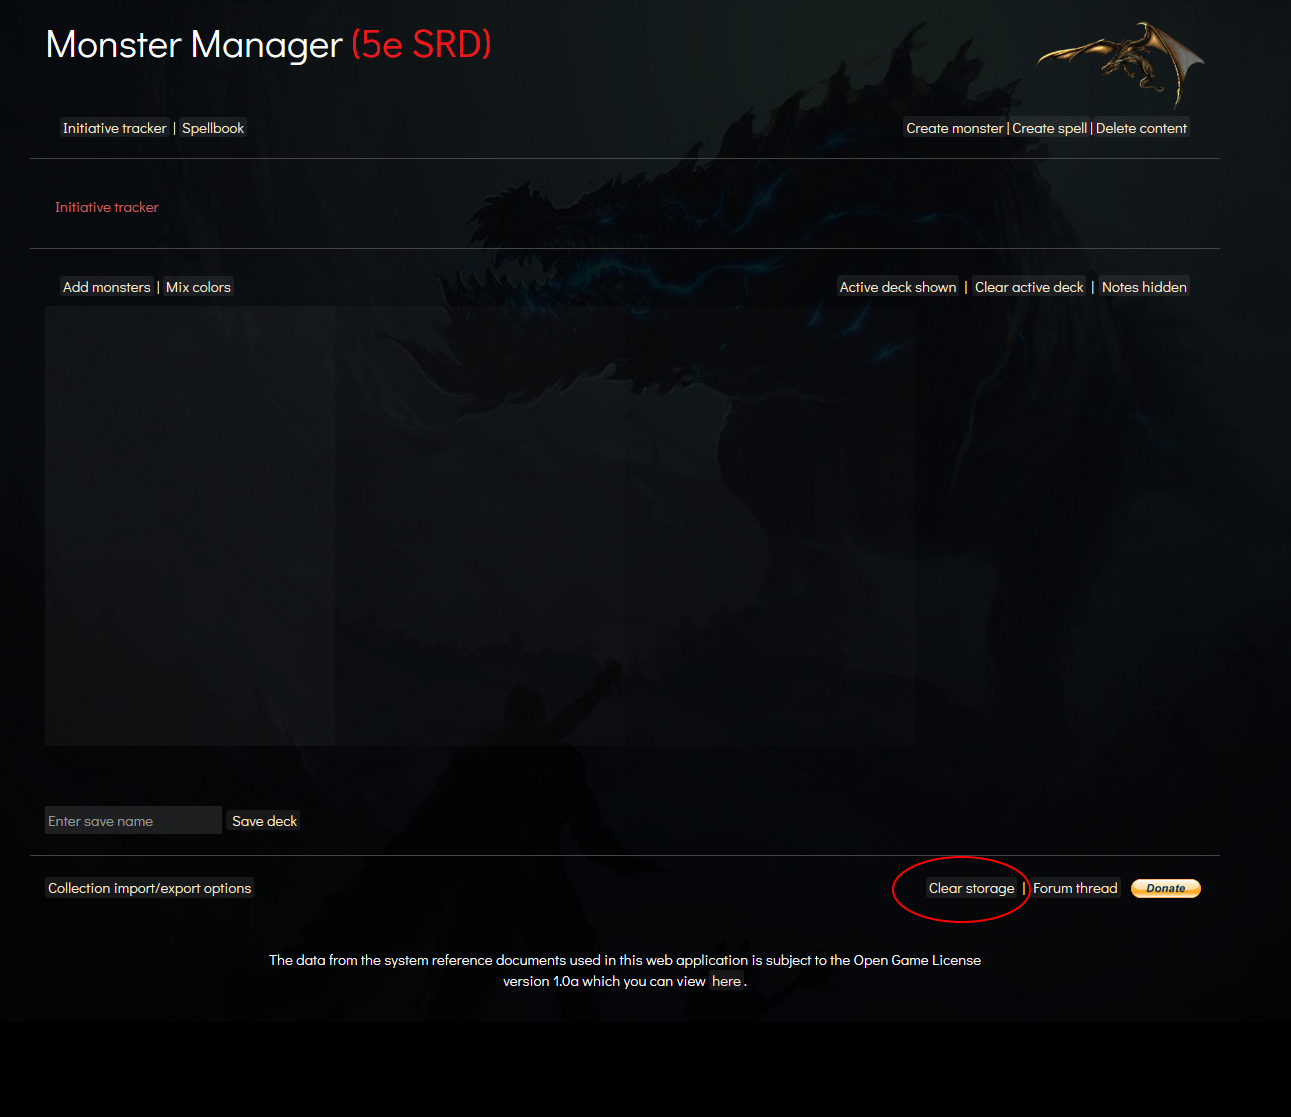
If the monster manager is not working or you are having issues with your data, you can click the “Clear storage” link in the bottom right corner of the screen. This will fix most issues, but keep in mind it will delete all your custom content such as deck collections, monsters and spell except of course the data which is available at all times from the system reference documents.
In the bottom right corner of the screen there is a link to the forum thread and for donating if you wish to support this project as I am using my spare time next to my studies to creating tools like this when I feel something is missing.
I hope you enjoy this tool and that it will greatly improve your experience as a dungeon master in the worlds greatest roleplaying game!